Using FTP
Not everyone using the WordPress Store Locator plugin & its addons are highly technical — and that’s okay. WordPress is an online publishing tool that makes life very easy for both highly-technical developers and non-technical users alike. Likewise, the aim has always been to create a Store Locator that also follows in the mold of WordPress’s ease of use.
After helping a number of users to use File Transfer Protocol (FTP), in order to get their addons up and running, decided to share this tutorial that has been shared with them — and hopefully it will help many others.
How to upload folders/files to your website (CSV Importer addon example)
1) You will need to use FTP to upload folders & files to your website. FTP is “File Transfer Protocol” — It’s how you can upload and download files from your website’s server (“server” is the remote computer hosting your website’s files so that it shows up online as a website)
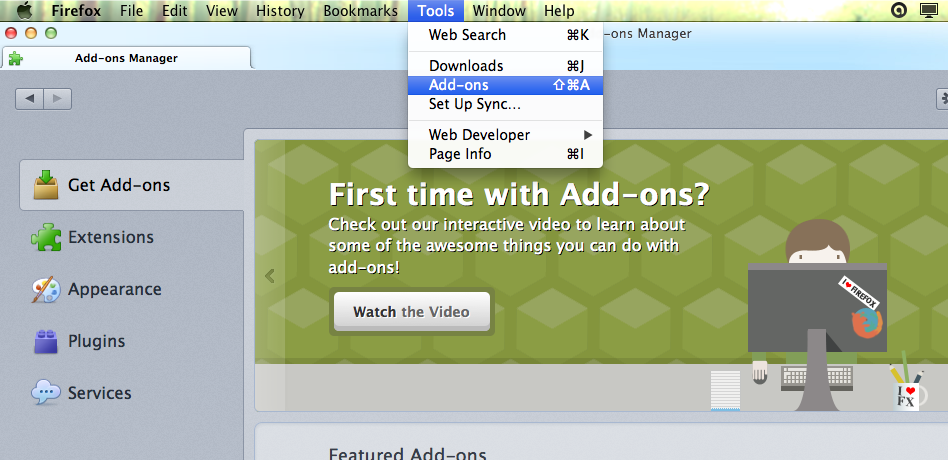
2) Easiest way to get FTP: Use the browser, FireFox, and install the FireFTP addon: http://fireftp.net/ (you can also go to “Tools > Add-ons” from within FireFox and then search for “FireFTP”)
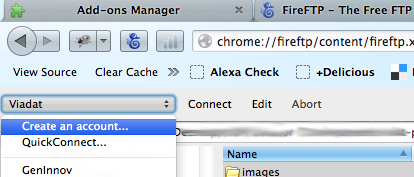
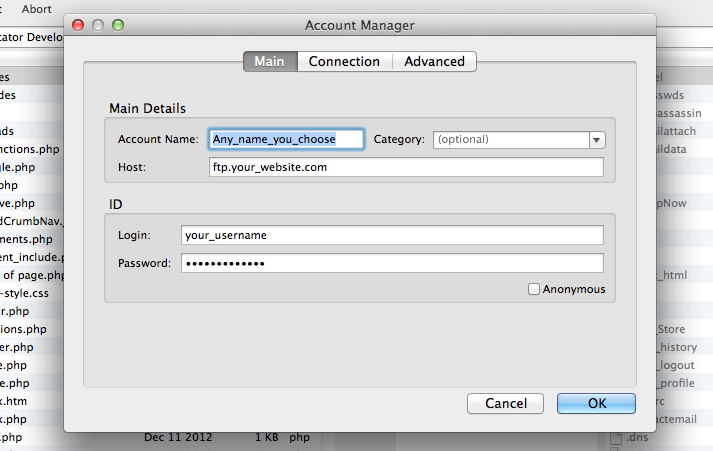
3) To log into your website using FireFTP (in order to upload folders & files), click the blue seahorse icon that shows up near your browser’s address bar. Then, from the drop down menu, choose “Create an account…”
4) Then, you will need to create an account for your website using the FTP login credentials for your website (might need to ask your website host about this, or if you use cPanel, the login might be the same for FTP)
(Note: Steps 5 & 6 pertain directly to the CSV Importer addon)
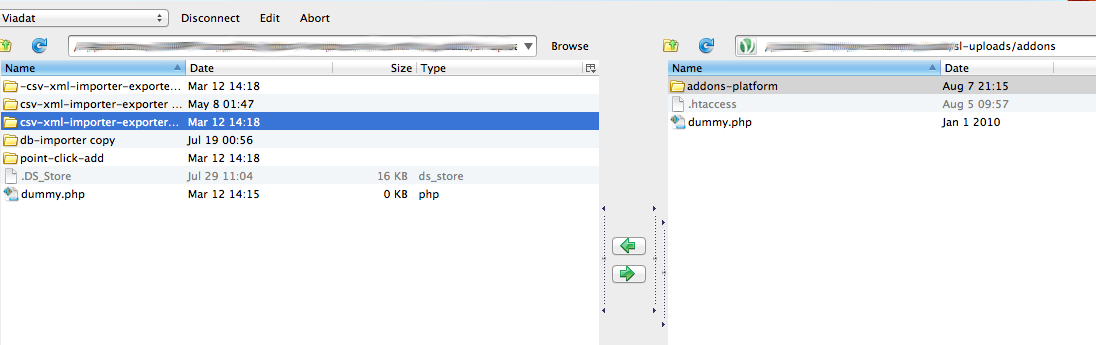
5) Once successfully connected, you will see the files on your computer on the left side of the screen, and the files on your website’s server on the right side of the screen. You will want to take your unzipped folder ‘/csv-xml-importer-exporter/’ and upload it to ‘/{your_WordPress_root}/wp-content/uploads/sl-uploads/addons/’ using the Green Right Arrow in the middle (use the Left Arrow to download files from your website to your computer)
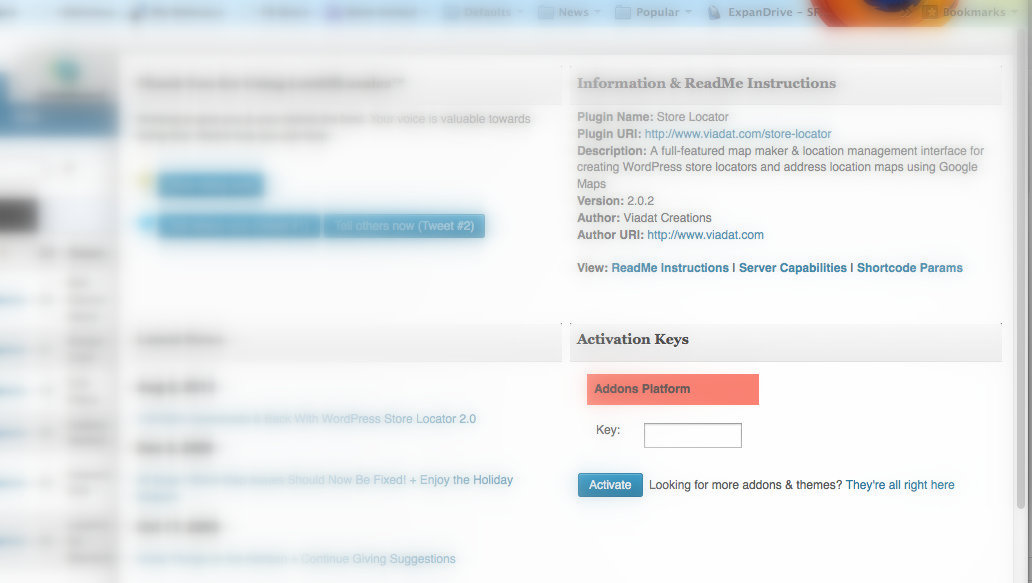
6) After successfully uploading to the “/addons” folder, go to your Store Locator admin Dashboard, and activate the CSV Importer using the key you received in your email (in your case, you will see the CSV Importer under “Activation Keys” instead of the Addons Platform). Paste your activation key here, and click the “Activate” button. Now you can go to Locations > Add, and perform your CSV import … but make sure to review the CSV Importer documentation beforehand.